Pages

Showing posts with label tutorial. Show all posts

Wednesday, January 18, 2012

Tutorial: How to Block your Crochet


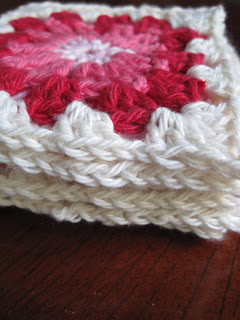
I've been enjoying crocheting my pink-red-cream cushion
and enjoying the way the circles turn into squares.

This rug was my inspiration.

Once I completed my nine squares
it was time to block them.
As you can see from the photo above, they were more 
circular than square in some parts,
tending to bulge on the sides.

I thought I'd give a tutorial on 
Blocking Your Crochet
using the spraying method.


Materials needed:

 *Crochet piece/s to be blocked

*stainless steel pins 
(to prevent any rust spots appearing on your work)

*flat piece of polystyrene foam
(ours was part of the packaging for our new fridge
if you don't have polystyrene you could use a cork square
or a towel spread tight on a carpet or bed)

*ruler or tape measure
(to rule up straight lines and measure sizes)

* Spray bottle of water
(or you can use spray starch, depending on your item)


Start pinning your work in one corner, 
along a straight edge, if possible.
Pin the two adjacent corners and lastly the diagonally opposite corner.

This is where you might want a ruler to measure your sides
to keep it square.

If you are blocking multiple pieces then keep pinning them as above, 
taking care to make each block the same size as the first one.

My piece of foam was conveniently just the right length 
for all my blocks :-)


I didn't bother with the ruler this time,
as it was easy to match the line of the foam board.


I love the first look of the squares like this
Neat and straight
all my wiggles stretched out!

Next, spray your pinned work lightly with water (or starch)
and leave to dry.

Here are the squares after they had dried and been unpinned:


Lovely and square, with nice sharp corners.
They are flatter than before, also.


When I came to join my squares
I needed to crochet around the edge of each of them
before joining.  
In hindsight I should have remembered to do that before blocking.

Once I'd done the extra crochet and then some
not-so-neat stitching them together
it was all looking pretty wonky again.
I didn't take a photo of that, it was late at night
and I wanted to get on with blocking it again.

I blocked the large square using exactly the same method,
only this time I used a larger piece of foam
and added some pins in the middle of the work 
to keep all the lines straight.


If you look closely you can see a few pins on inside corners.


Now I'm just waiting for it to dry 
before I add some more granny rows around the edges.
After that I will block it again, 
and photograph the finished cushion.

Depending on your work 
and the size of foam you have available 
you may want to block in stages, as I did, 
or at the end when you have finished.

Here is a photo of my granny square rug being blocked:


This was before I had foam from the fridge,
I had to use an old (but clean) piece of carpet
which was curled up a little and only just big enough.
I had to block them all in a hurry because our renovations 
were about to begin,
and it was hard to keep the pins in place,
hence the not-so-straight edges.
But they turned out fine, the finished
rug is lovely and square.
One day when our living room is not part of a building site,
I'll post a photo!

So you can see that blocking is very easy, 
but it will make a huge difference to your
finished crocheted item!

Thursday, May 20, 2010

Last-Minute High School Musical costume How-To


Today at school the girls could dress as a character from a "school" movie - Grease, High School Musical, Hogwarts, School of Rock etc., or they could just wear mufti.

Emily mentioned this to me a day or two ago, and then last night at bedtime (9.00pm):

"I wanted to dress as a cheerleader from HSM!"

ummm ... not possible!

"Let me think about it"

... a bit of googling ...

and this is what I came up with. A white and red felt E stitched onto a red jacket Emily already had. She put the rest of the outfit together, and voila, a very cute East High School student, ready for school!

I used the Rockwell font to print out a large E, which I used as a pattern to cut a white felt E. I then cut a larger red E and an even larger white E (I just eyeballed these, didn't use a pattern - hence the slight wonkiness ...) I pulled out the sewing machine and topstitched through all the layers, then basted the whole thing onto the jacket by hand.

Time taken: 10minutes
Wearer satisfaction: high!
(better than mufti but not too conspicuous either)

As a bonus, E is of course Emily's initial, so she's going to keep this E on the jacket for a while.

Thursday, April 2, 2009

Papercutting for a party - a tutorial


My Dad turns 70 this weekend, and Mum asked me to make something saying "70" for the party, to sit on the buffet in the dining room. I took a few days to think of something the right size and materials, something not too expensive but still effective ...

Ladies and gentlemen ... I present to you ... the art of papercutting. (Sometimes known as scherenschnitte, but mine is not so finely cut ...)

Materials:
2 12x12 sheets of Bazzill cardstock
white chalk pencil
kneadable eraser (or other)
1 craft knife with a fine blade
1 self-healing cutting mat
Also you need about 2 hours & good light.

1. Print out a large 7 and 0 using Word Art in Word, cut out.


2. Trace lightly onto the card. I used a chalk pencil as it writes lightly and is easy to rub out, but you could use a soft lead pencil if you had to.


3. Around the numbers draw some stylized leaf and grass shapes, add an insect or two. Make sure you create lots of "bridges" between the shapes so it can all hold together.


4. When you are happy with your design, start cutting in the centre, small shapes before large shapes. Turn the card as needed and cut towards yourself. Cut out sharp points carefully to avoid tears when punching out shapes.


5. Stop every now and then and look out at a distant object, to rest your eyes and neck. It is a wet day here.

6. When you are finished cutting, admire your finished work against the window.
Unfortunately the party is at night so I am going to mount this on another colour for strength so it can stand on an easel.

7. Place small squares of foam tape on the back of your papercut.


8. Adhere to another piece of card in a different colour (although white on white would be spectacular)

9. Admire again, this time with your work on an easel. Enjoy the light and shadows.


10. Have a few stretches and go for a walk.

11. Make sure you remember to take it to the party.

Wednesday, September 10, 2008

Regency Bonnet Tutorial

or ...
How to Thriftfully Turn a Reticule and Straw Hat into a Bonnet fit for Eliza Bennett

Should you find yourself with a spare hour or two, a velvet handbag and an old straw hat, you could try the following project, which was inspired by this tutorial. (and the instructions are much more detailed than these, but she didn't make hers out of a bag!)


My bag is made of (cheap) velvet and lined with a patterned cotton (op shop $4). When I saw it hanging in the opshop it already looked like a bonnet to me (but then I did have bonnets on the brain at the time. At first I thought perhaps I could cleverly manipulate the bag without cutting it up, by placing it just so, on my head. Loud guffaws of laughter from other members of my family told me this was not to be the case. So I preceded to do the following:


1. Cut the bag apart along the seams and remove lining. (If you look closely you will see by the little bits of red fluff everywhere that I had, in fact, cut the bag before taking the photo ... ah the dilemmas of blogging - to create first, or to photograph?)


As you can see my bag was already gathered, so I made this part the back of the bonnet. I handsewed a gathering thread along the opposite length of the fabric so now I had a piece of fabric gathered at both ends.


If you don't have an old bag to use then use a piece of fabric as in the original tutorial, and gather both ends, one loosely and one tightly.
Join the two remaining sides with a straight seam.


2. Now for the hat. Try tipping the hat back on your head and seeing how much of the hat you want to use.


Then mark and cut your hat (that's the scary bit)


If I was to make my bonnet again I would use over half the hat to make it. But now I have enough left over to make another bonnet, should the need arise. LOL


Now attach the fabric over the hat, sewing the larger gathered end right over the crown of the hat, and onto the brim, leaving as much brim as you desire. Again I handstitched this, stitching right through the fabric and the straw hat. At the back of the bonnet you can cover the other gathering (in my case the top of my bag) with a circle of fabric.


Cut the handles of your bag and attach them to the inside bottom of your bonnet as a bonnet ribbon, if desired, or use some thick grosgrain ribbon.


Decorate with little flowers made of grosgrain ribbon and a button. My hat ($2 at another op shop) was coincidentally trimmed with the right colour to match the rest of the bonnet but you could trim the edge of the hat too if you needed to.


The finished product.


A Regency bonnet for a total of $6 plus a bit of ribbon.


Now I just need to incorporate a lint brush into my costume so as I can keep it looking good on
the night!

Saturday, July 19, 2008

Colour-on-Black Bookmark Tutorial

How to make a beautiful bookmark:


(Mine is on the left and (8yo) Laura's on the right)


1. Select some stickers. We used gold-edged butterflies.


2. Place stickers on a piece of black card.


3. If you want, at this point you could lightly draw a border around the edge of the bookmark as a guide to where you will leave the edges blank.


4. Using good-quality pencils (we used Prismacolors) and working on a soft even surface such as a magazine, colour around the stickers using the colours and shapes found in the stickers as a guide.


Don't forget to keep your digital pet nearby in case it wants something to eat.

5. Admire your finished bookmarks. These remind us of stained-glass windows. The way these pencils show up so richly on black is just beautiful.


by Laura